
Our focus lately has been on saving more money. One of the most effective ways to do that with pretty immediate results is through a grocery budget. So a couple weeks ago, we got more serious about bread-making. While I would love to make bread every morning, it just doesn’t happen. My husband has actually been the one doing most of the bread-making, which I am so grateful for.
He has pretty much schooled me in bread. Not bread making, but bread eating. I’m so glad because, without it, we couldn’t enjoy the last bit of sauce left on our plates. Without it, we would only have crackers to go with our mate (pronounced MA-tay) in the morning or at merienda (ok, so I don’t drink mate, but my husband is pretty serious about it). Without it, we would be utterly lost (ok, a bit dramatic, I admit).
A couple of months ago, we tried a recipe from my Bread Bonanza board on Pinterest. We loved it, and it only requires 4 ingredients. The process is very simple, so hubby doesn’t even have to refer to the recipe. While he loves my cooking and knows that I follow recipes, he doesn’t enjoy following recipes himself.
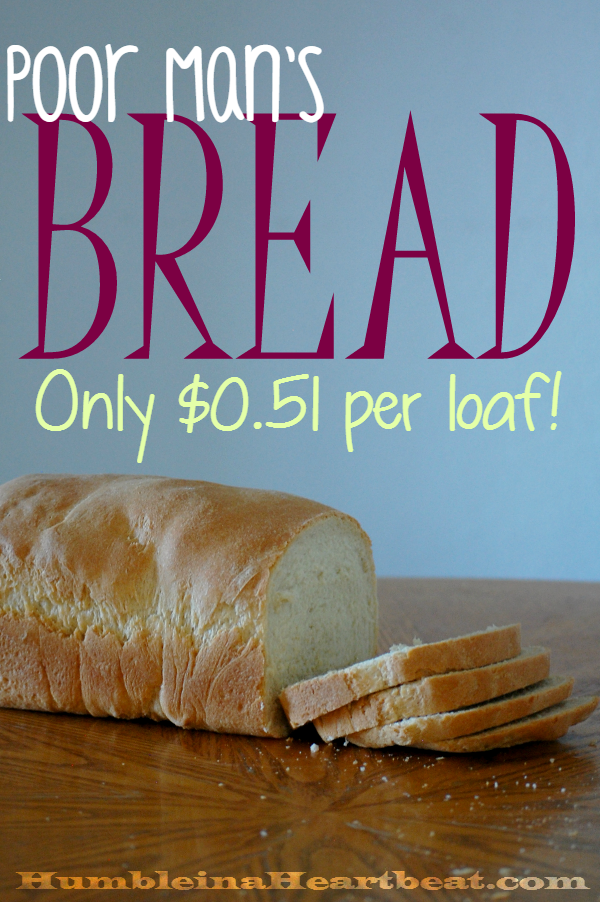
This Poor Man’s Bread is flavorful and simple, two things that we pretty much require from a great bread recipe. Plus, it’s 4x cheaper than buying bread at the store! I used to buy 1-2 loaves of bread each week. Each loaf cost me about $1.98. This Poor Man’s Bread only costs $0.51 so we can eat more bread for the same price!
I have discussed the cost of bread before, but when I did that post, I was using bread recipes that had several more ingredients than this one to compare to the bread from the grocery store. If I had compared store-bought bread with this specific bread recipe, I probably would have made the switch to homemade bread then!
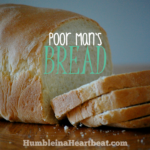
Poor Man’s Bread
Ingredients
- 1 1/2 cups water
- 1 tsp. instant yeast
- 4-5 cups flour
- 2 tsp. salt
Instructions
-
In the bowl of a stand mixer, add the water, yeast, salt, and flour (start with 4 cups). Mix with the hook attachment. If you can tell that the dough is still really sticky, add more flour. You want the dough to be smooth and elastic and not stick to your fingers. Don’t add too much flour or you will get a really dense bread.
-
Knead the dough with the dough hook for about 10 minutes until the dough has become smooth and elastic. Coat a large bowl with olive oil and put the dough in the bowl, making sure the oil gets all over it.
-
Cover the bowl with a light towel and let it rise for about 2-4 hours until it doubles in volume.
-
Take the dough out of the bowl and place on a clean counter surface to roll out. Add some flour to the counter if the dough is sticking. Roll it out to 8×11-inches, cover it with a towel, and let it rest for 10 minutes.
-
Roll up the dough from the shortest side to make it into a loaf. Place into a greased 9×5-inch loaf pan, cover with the towel, and let it rise again for another hour. About 30 minutes before you put it in the oven, preheat the oven to 350F.
-
Put the bread into the oven once it has risen at least 1-2 inches above the rim of the loaf pan. Let it bake for 45 minutes. It should have a nice golden color when it is done.
-
Once you take it out of the oven, let it cool before slicing. Enjoy! Makes 1 loaf of bread.
Recipe Notes
Adapted from La Fuji Mama.
I like to make two loaves at a time, but my mixer only has enough room to do one at a time. I just mix and knead the first batch, move it to another bowl, and start the next batch. This bread tends to be on the crusty side, but I’ve found that if you coat the bread with olive oil for the first rise and then again for the rise in the bread pan that it is much less crusty. Also, let the bread cool outside of the bread pan, and then put it in a bag as soon as it is room temperature. Usually the crust becomes very soft after sitting in the bag.
UPDATE MARCH 2016: Someone in the comments asked if they could make this bread with whole wheat flour. I had never done it before, but I was certain that you probably could. Well, I decided to try it a few weeks ago with just 1 cup of whole wheat flour and 3 cups of regular white flour. I thought it turned out wonderful! The main difference is that it will take longer for the dough to rise. I also noticed that it was much softer than when I use all white flour. The crust, especially, was very soft.
How much do you normally pay for bread?


- Versatile and Flavorful Pumpkin Chicken Soup - 01.03.26
- Easy Instant Pot Bone Broth Recipe - 09.20.25
- Healthy Make-Ahead Tomato Onion Salad Jars - 07.11.25
And not only is it super cheap (though does require effort), it probably tastes 84753485748x better than anything you buy in store. Your domestic skills impress me!
Thanks!! Actually, it really doesn’t take that much time. The instructions make it seem like it takes forever, but once you make it a couple times you can spend less than 15 minutes active time on it! The rest of the time is just letting the bread rise or bake.
What if you don’t have a mixer? Sorry, it may seem silly. I am new to cooking and baking. I would love to try but I don’t really have anyone to ask for help. Thank you.
Not silly at all, Alisa. I was there once, so I totally understand! Without a stand mixer, you can definitely make this bread. It will just take a lot more of your time. I have always used my stand mixer, so I couldn’t tell you how to do it. However, here is a wonderful resource to help you out: http://www.seriouseats.com/2014/09/breadmaking-101-how-to-mix-and-knead-dough-step-by-step.html
Read through it before you start as it tells you how to make bread without a stand mixer part way down the page. I hope this works for you!
I have made bread in the past but not like this, I cheated and used an electric bread machine!
As to your question, I’d say to check a few resale/thrift stores. I frequently see pre-owned stand mixers for $20 or less…and they are generally in pretty good condition!
Bonus: Most thrift stores are run by charities, so your money goes to help others!
Is the yeast, water, and salt mixed first till foamy before the flour?
Can I Freeze this Bread?
Yes!
I love how simple this recipe is!
Let me know if you make it, Julie! 🙂
Wow! This is great and simple! You can’t argue with the price too.
Thanks for sharing!
Wishing you a lovely day.
xoxo
Let me know if you try it!
This is the recipe that I use when I make bread, however, I do add a teaspoon of sugar to the yeast to help it activate. Nothing better than when the smell of fresh baked bread fills your house!
Ooh, I know! The bread seems to rise just fine without the sugar, but I use instant yeast. Maybe you are using active dry yeast?
Have you ever tried this recipe with whole wheat flour? I’d imagine just adding a bit more liquid would make it work, but I was just curious. We have tried to make the switch to all whole wheat.
Also – what are you paying for a 5lb bag of flour? I know whole wheat flour is usually more expensive so I’m wondering if it would be worth it for us.
Emily, thanks for your questions. I have never tried it with whole wheat flour, but if you do, please let me know if it works out. I figured the cost of the flour by the 25 lb. bag of flour we buy for $7.99. It gives us about 80 cups of flour, so each cup is about $0.10. So if you assumed that a 5 lb. bag of flour contained about 16 cups and costs about $3.50, you’re looking at about $0.22 per cup of flour. Not as cheap, but still cheaper than store-bought where I live.
Is this all pourose flour or self-rising?
I use all purpose flour, Amanda. Thanks for asking!
Awesome, thank you!
Have you tried with a bread machine instead of a stand mixer?
I haven’t, Jennifer. But this article about converting recipes for bread machines should help you if you’d like to try: http://www.bhg.com/recipes/bread/converting-your-favorite-recipes/
Let me know if it works out!
Can i let it raise longer? Like 12 hours ? I started too late
I sometimes start too late and let it rise overnight. It does tend to be more crusty and sometimes there is a yeasty smell and/or taste. If that doesn’t bother you, go for it!
In the past I have always rubbed a stick of butter over the loaf after pulling from the oven. Just enough to lightly coat the surface. This keeps the top crust soft.
Adds a couple calories, but does make it tasty.
I add milled flax seed just for a tad bit more fiber… you don’t even notice it, and it still turns out very very yummy!!! Like 1 cup subbed instead of flour.
That’s great to hear, I might try that next time!
Wondering if this dough would be okay to freeze? And what stage it should be done at if you’ve done it before? We use lots of bread so making a bunch of dough and freezing seems so much more practical.
I’ve never frozen this bread dough before. That’s something I should try!
how many slices per loaf?
It would all depend on how big your slices are. I think we normally get about 15-18 slices each loaf.
I just made it, and love it! What if I want the keep the crustiness? How would you recommend wrapping? Thanks, Jennifer
I’m glad you had a good experience with the bread, Jennifer! I have left the bread out many times and the crust stays hard. However, sometimes the middle gets hard as well, so if it’s just the crust you want hard, I would only leave it out when you haven’t cut into it yet. Hope that helps!
okay so I followed the directions which seemed pretty easy and I put my dough in a bowl for the first rise but it never rose at all and it’s been 4 hours. I used instant yeast like it said. What could be the problem?
A number of things could have gone wrong. First, are you sure that the yeast was not expired? Actually, even if you just recently bought the yeast, it could be dead. Another issue could have been that it is too cold in your house. With it being winter, you may want to turn on your oven (warm setting or 200F is probably just right) and keep the bowl with the bread on top of your stove. Finally, did you check the temperature of the water? I normally don’t when I’m using instant yeast, but I have made bread so many times that I know how warm the water should feel. Sorry your first attempt at this bread didn’t work out, Stephanie. I hope you can pinpoint the issue and try this recipe again!
Please may I know the size of the pan you used to make the bread
9×5
I am new at making bread and your directions say nothing about getting the yeast to a bubbly stage with the acertain temp. water and salt. So i followed your directions and added all of the ingredients to the mixer bowl. Well least to say it did not raise.. HELP!!!!