
Just as you bring your tiny bundle of joy home from the hospital, you might remember that you still have to get newborn pictures taken as well as find the perfect birth announcement to share the wonderful news with everyone. And neither of those expenses are cheap.
Even with a coupon from one of the big online photo printing services, you can still end up spending $50-$200 on birth announcements depending on which one you choose and how many of them you need to order.
But if you take just a little bit of time while your sweet angel is napping and make your own birth announcements, you can save a significant amount of money. You could even go the really cheap route and just send them via email. Some grandmas might be appalled at this, but when you have a new baby you gotta save some cash!

Tutorials on Making Your Own Birth Announcements
If you have no idea how to go about making your own announcements, you’re in luck! I have two tutorials to help you out. The first tutorial will be in PicMonkey and the second will be using Canva.
You can use both PicMonkey and Canva absolutely free. There will be features from both that will require payment, but you can always just stick to the free editing tools.
Before you start creating your announcement, make sure you have the pictures ready to go (as in, they’ve been edited already; you can use my handy post on the 5 edits every picture needs to get started if you’re not sure). It will also be helpful if you know exactly the color scheme you will be working with. You can get lots of great ideas using the website Design Seeds.
Creating a Birth Announcement in PicMonkey
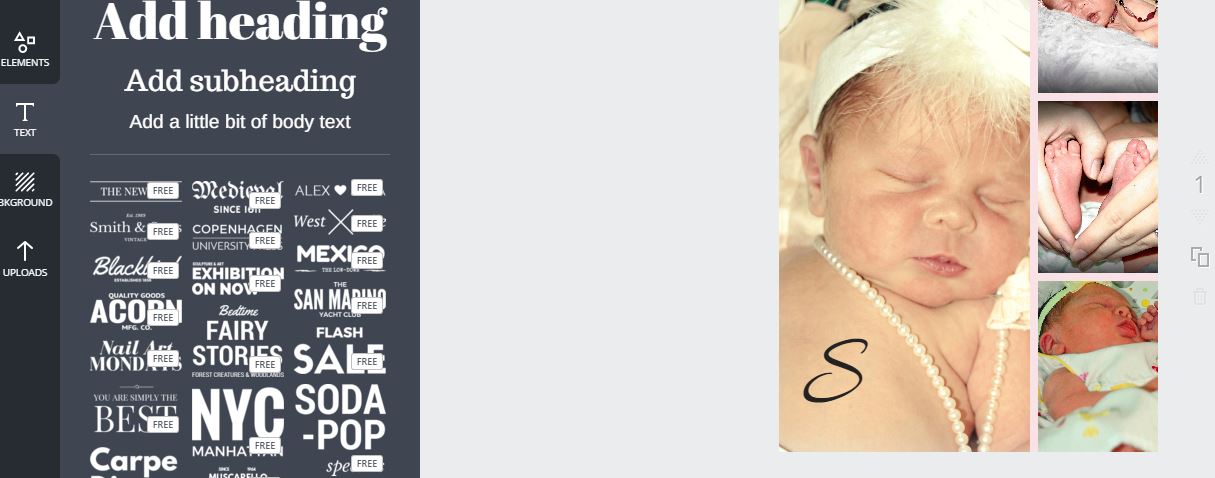
Head on over to PicMonkey.com and choose either “Design” or “Collage.” Design will be easy to add backgrounds and text to, whereas collage is just placing the pictures and then you’ll save the collage in order to add text and overlays.
I will use “Design” for this tutorial.
In the Basic Edits tab, click “Resize” and choose the size that works best for your needs. These sizes will likely be what you need. You can also browse birth announcements in both TinyPrints and Shutterfly for other sizes.
- 5×7 is 1500×2100 (vertical) or 7×5 is 2100×1500 (horizontal)
- 5.22×5.22 is 1566×1566 (I thought this one would be great if you wanted to print it out and cut into a heart shape; check TinyPrints for this particular size)
- 5.5×8.5 is 1650×2550 (vertical) or 8.5×5.5 is 2550×1650 (horizontal)
- Or use the standard photo print sizes for help converting to pixels
![]() I decided to make an 8.5 x 5.5 announcement. So I unclicked “Keep proportions” and input 2550 in the first box and 1650 in the second box.
I decided to make an 8.5 x 5.5 announcement. So I unclicked “Keep proportions” and input 2550 in the first box and 1650 in the second box.
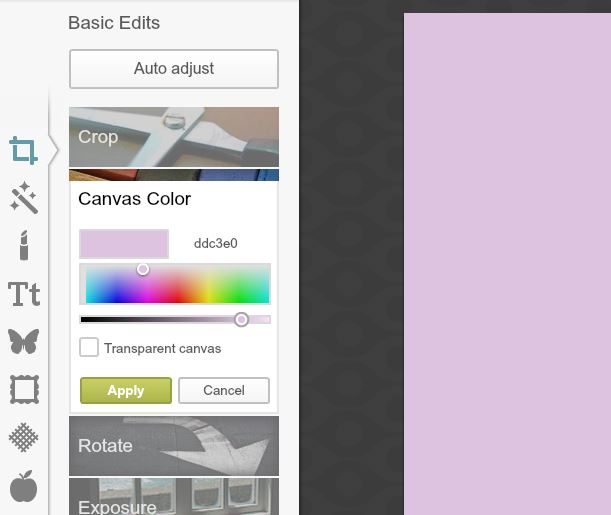 Before I added a picture, I chose my background color and other effects that would make it look cute. So I clicked on “Canvas color” and changed the color of the background to a purple that I like. Since I knew the color code, I just highlighted the current “ffffff” and replaced it with “DDC3E0” and clicked “apply.”
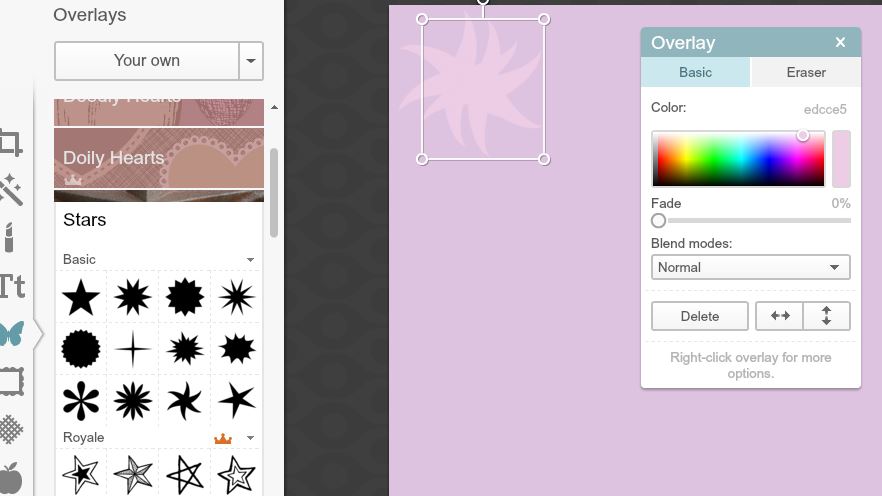 The next thing I did was add an overlay in order to make a design on my background. I added a star (and since I wanted to keep this completely free for you, I didn’t use any Royale features), and it showed up on the design in black. I easily changed the color with the little “Overlay” box that popped up. I chose to use the color “EDCCE5.” Next, I duplicated this star, so I right clicked while the mouse was on it and chose “duplicate overlay.” I made several of these stars until I was satisfied with the results. I was able to move them around to wherever I wanted, rotate them using the little circle in the middle at the top, and resize them.
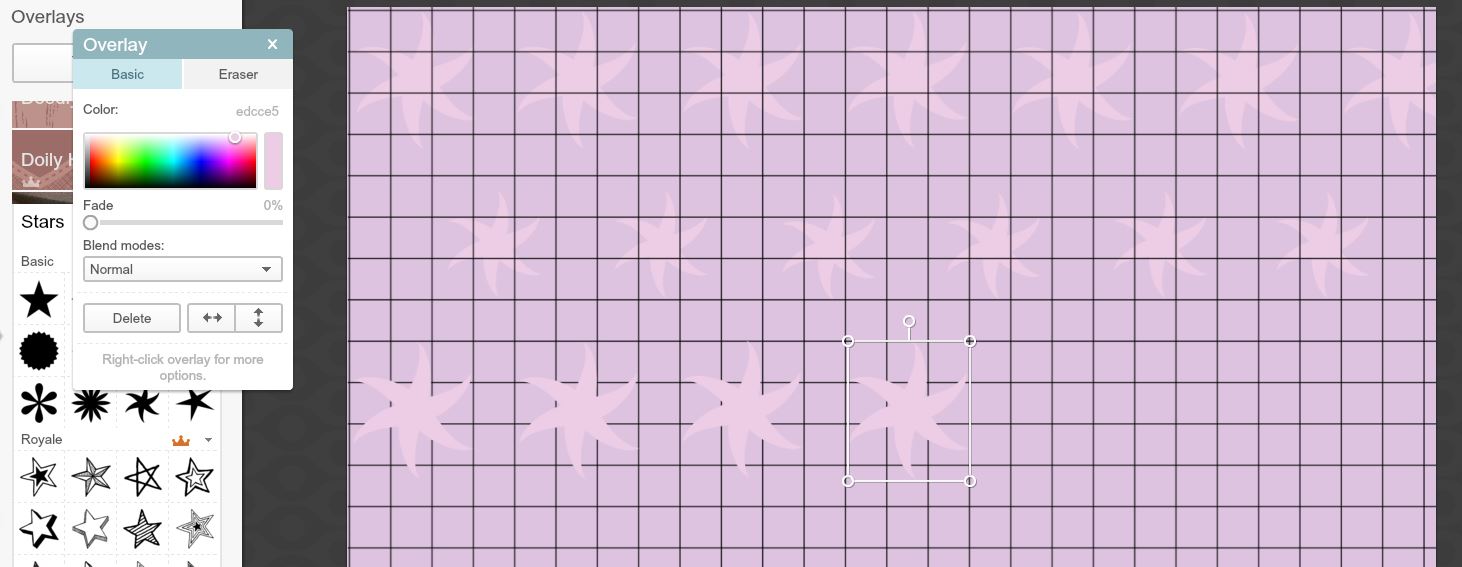 If you want to do something similar (i.e. make your own design), it might be helpful to use this grid (I wish I could remember where I found this!) so you can make sure things line up.
 Then I added the picture I wanted as well as text. With text, you can definitely use your own by clicking “Yours” in the text tab.
I saved my picture as a .jpg file and chose the folder on my computer that I wanted to save it in.
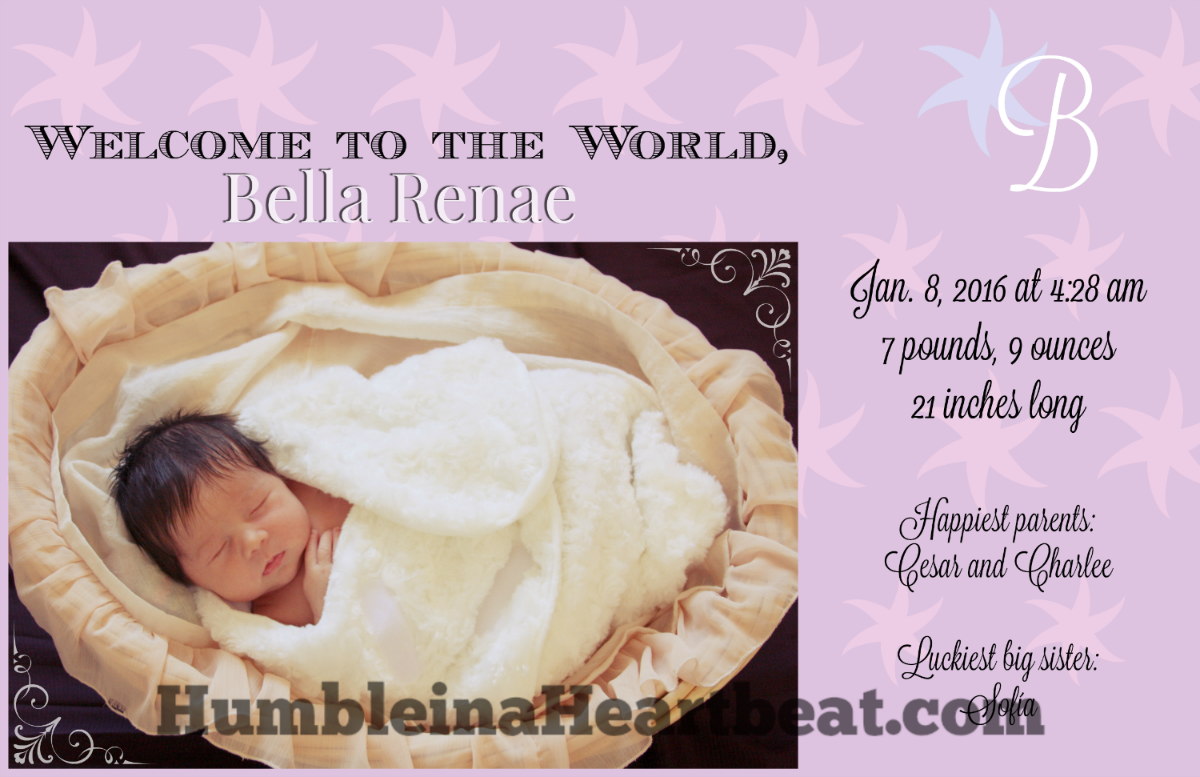 This is what the final announcement looks like.
Creating a Birth Announcement in Canva
Go to Canva.com and set up an account or sign if you already have one.
Click “custom dimensions” in the top right corner and change it to inches if desired or leave it on pixels. Enter the width and the height and click “Design.”
For this tutorial, I did a 5×7 announcement.
You can scroll through the layouts tab to find a layout that works for your idea. I chose a layout with 4 sections to add 4 pictures.
If you would like a background, you can choose one that is in Canva or choose a color you like. You could also upload one of your own. Most of the backgrounds in Canva cost $1. I went ahead and just chose a color that I liked, “F9E2E5.”
 Now upload the pictures that you will be using and drag and drop where you would like them. You will likely have to resize them using the corner handles or crop them if you have chosen to use a layout.
 Add some text if desired. For this tutorial, I just added the first initial and think this would be a great idea if you plan to send the announcement via email and just add all the details in the email. Completely up to you!
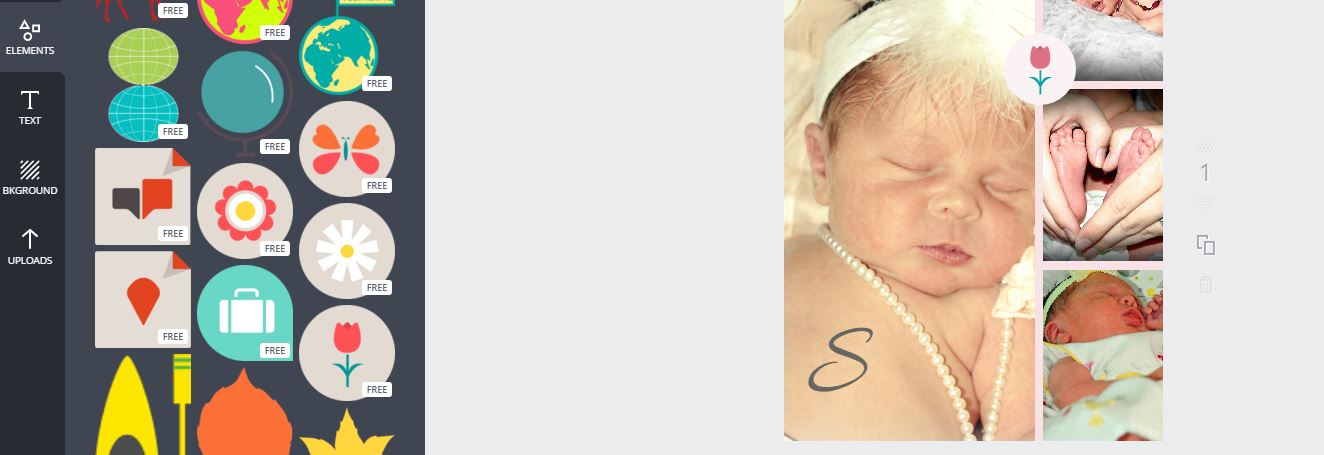 It might be fun to take a look at the elements tab and see if there are any designs you’d like to add to the announcement. I picked a tulip and changed the colors according to what I had chosen at the beginning.
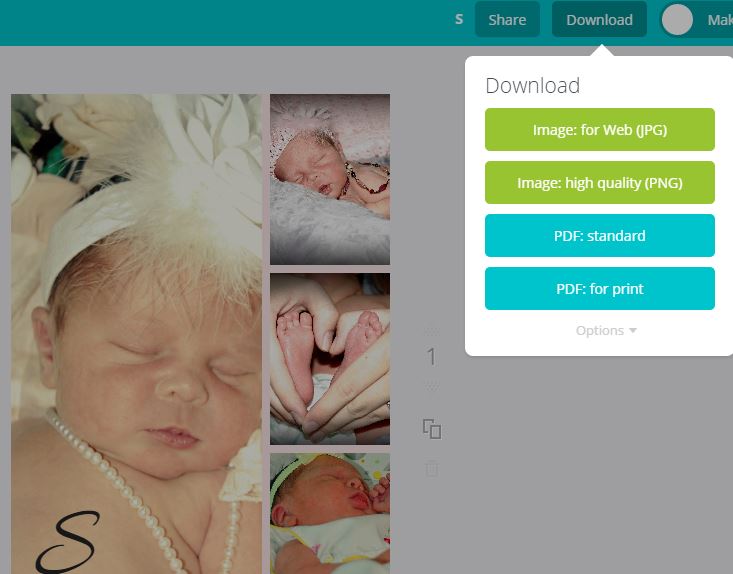 Finally, download the picture as normal quality if you plan to send it in email (as a jpeg) or high quality (as a png) if you plan to print out the announcements.
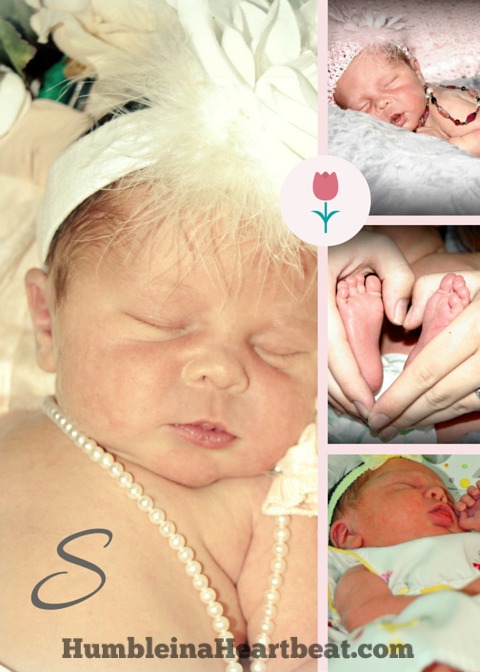 And here’s what the final announcement in Canva looks like.
 I also went ahead and made another one to show you that you can do a lot of different things if you’d like. This one was a 5.66 x 5.66 announcement.
The biggest advantage to using Canva over Picmonkey is that you can continue working on your image at a later date, whereas with PicMonkey you will likely have to finish quickly. I have lost pictures I’ve been working on in there because some plugin crashed or I left it open while I was away for a few hours and it just disappeared. Just FYI. 🙂
So if you’re looking to save a bit of money in order to buy diapers, consider making your own birth announcements. Let your creativity blossom!
Have you ever made your own birth announcements?

- Versatile and Flavorful Pumpkin Chicken Soup - 01.03.26
- Easy Instant Pot Bone Broth Recipe - 09.20.25
- Healthy Make-Ahead Tomato Onion Salad Jars - 07.11.25
Leave a Reply